
I've found charts and rankings of bonus cards telling you how valuable each bonus is in isolation. Those rankings are great for helping you during turn zero (the setup phase when you discard birds, food, and a bonus card.)
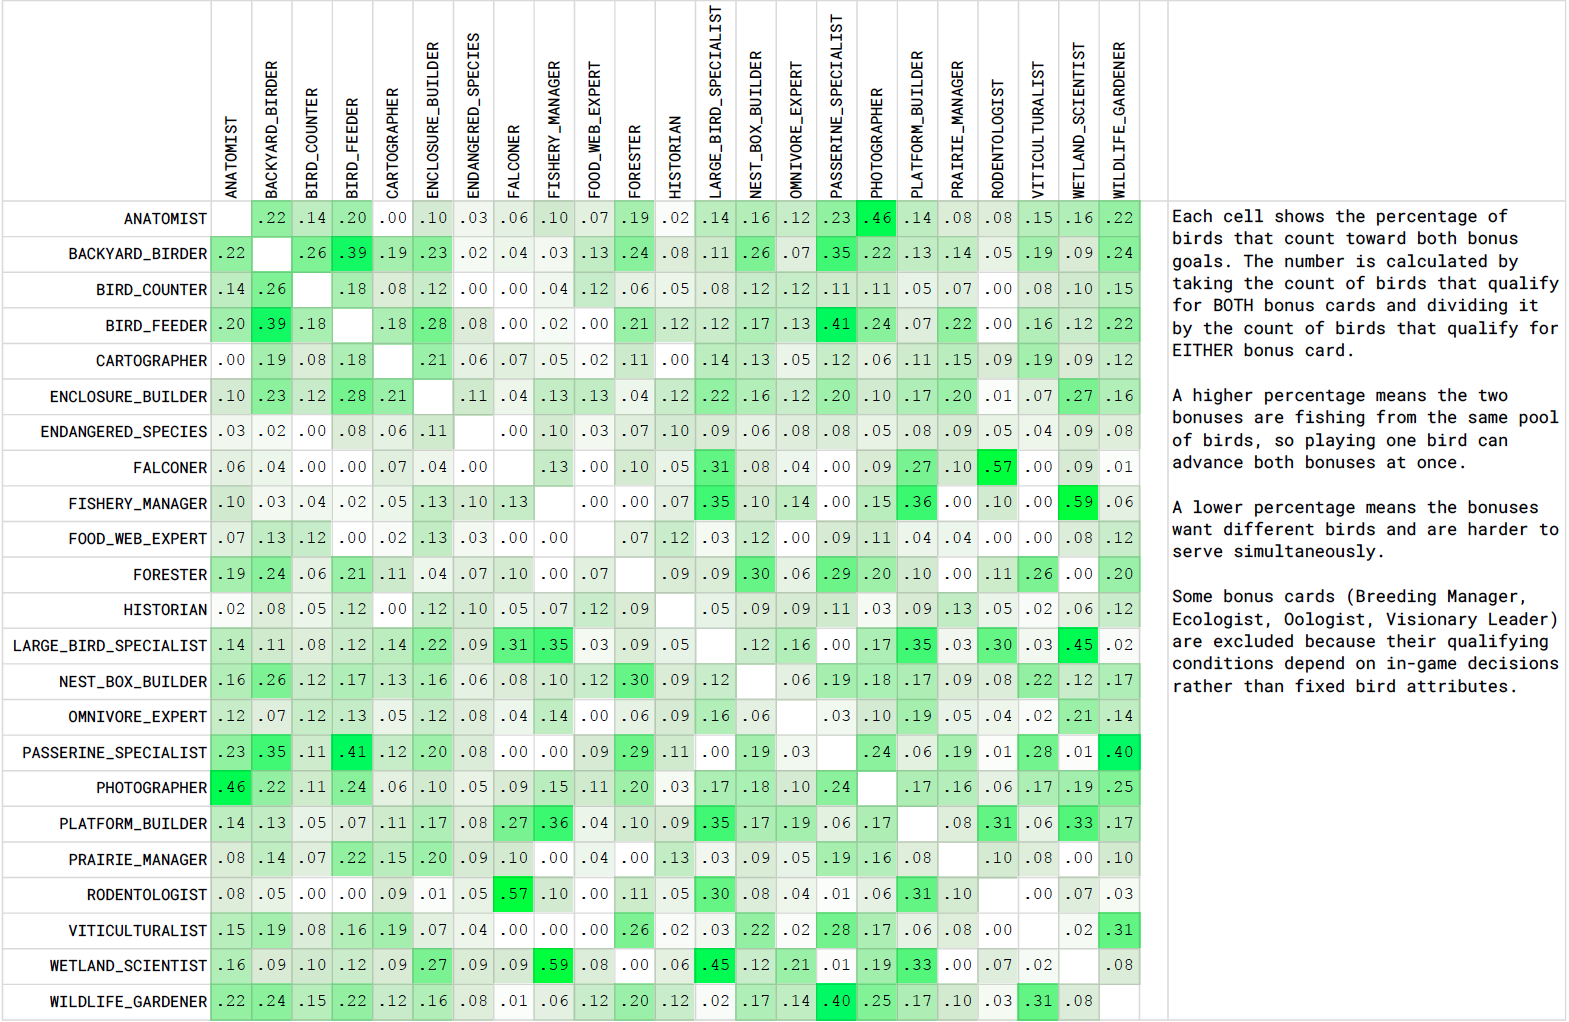
This chart is for the early- to mid-game when you already have your first bonus card and you draw two additional bonus cards and have to choose one.
How to use it: find the row with the bonus card you already have in your hand, then find the column where it intersects each of the two cards you just drew. A higher number means you have better odds of getting birds that advance BOTH bonus goals.
For example, if you already have Anatomist as your first bonus card, and you draw Historian (.02) and Photographer (.46), you would be better off keeping Photographer since nearly 50% of the cards that match either Anatomist or Photographer match both of them, whereas only 2% of the cards that match either Anatomist or Historian match both of them.
In other words, given that you already have bonus card A, will a second bonus card help you by drawing from the same bird pool?
Note: this chart helps you pick bonus cards when you still have time to draft birds that qualify for them. By mid-Round 3 or later, forget the chart. Just look at the number BGA shows you on each card for how many birds already on your board qualify. At that point you're not flexible on your goals anymore, you're just counting what you've got.
You can view or download the image at https://csnizik.github.io/Wingspan-Stat ... erlaps.png
This chart is for the early- to mid-game when you already have your first bonus card and you draw two additional bonus cards and have to choose one.
How to use it: find the row with the bonus card you already have in your hand, then find the column where it intersects each of the two cards you just drew. A higher number means you have better odds of getting birds that advance BOTH bonus goals.
For example, if you already have Anatomist as your first bonus card, and you draw Historian (.02) and Photographer (.46), you would be better off keeping Photographer since nearly 50% of the cards that match either Anatomist or Photographer match both of them, whereas only 2% of the cards that match either Anatomist or Historian match both of them.
In other words, given that you already have bonus card A, will a second bonus card help you by drawing from the same bird pool?
Note: this chart helps you pick bonus cards when you still have time to draft birds that qualify for them. By mid-Round 3 or later, forget the chart. Just look at the number BGA shows you on each card for how many birds already on your board qualify. At that point you're not flexible on your goals anymore, you're just counting what you've got.
You can view or download the image at https://csnizik.github.io/Wingspan-Stat ... erlaps.png

