
TL;DR: Stop collecting resources like a good citizen. Embrace the criminal life. This guide covers how to weaponize the Black Market to punish your opponent, how to transition into the mid and late game, and how to counter the strategy if you're on the receiving end.
⠄・ ⋆ ・ ⠄⠂⋆ ・ ⠄⠂⋆ ・ ⠄⠄・ ⋆ ・ ⠄⠂⋆ ・ ⠄⠂⋆ ・ ⠄⠄・ ⋆ ・ ⠄⠂⋆ ・ ⠄⠂⋆ ・ ⠄⠄・ ⋆ ・ ⠄⠂⋆ ・ ⠄⠂⋆ ・ ⠄
Why Play Black Market?
If you're anything like me, you look at the board and think: collecting resources and building stuff is boring. The Black Market (BM) strategy is for players who'd rather watch the world burn. Specifically, their opponent's world.
This guide focuses on 1v1 play. The principles translate to 3+ player games, but the politics and timing get significantly more complicated. In a 1v1, your Town Center target is obvious, there's only one opponent. In a multiplayer game, you have to decide whose workers to catch, and that means constantly evaluating who's actually ahead. Which is hard to do consistently.
⠄・ ⋆ ・ ⠄⠂⋆ ・ ⠄⠂⋆ ・ ⠄⠄・ ⋆ ・ ⠄⠂⋆ ・ ⠄⠂⋆ ・ ⠄⠄・ ⋆ ・ ⠄⠂⋆ ・ ⠄⠂⋆ ・ ⠄⠄・ ⋆ ・ ⠄⠂⋆ ・ ⠄⠂⋆ ・ ⠄
Key Concepts Before You Start
Before diving in, internalize these fundamentals. They'll help you adapt on the fly.
⠄・ ⋆ ・ ⠄⠂⋆ ・ ⠄⠂⋆ ・ ⠄⠄・ ⋆ ・ ⠄⠂⋆ ・ ⠄⠂⋆ ・ ⠄⠄・ ⋆ ・ ⠄⠂⋆ ・ ⠄⠂⋆ ・ ⠄⠄・ ⋆ ・ ⠄⠂⋆ ・ ⠄⠂⋆ ・ ⠄
The Early Game — Setting Up
You will need one of these two apprentices on Turn 1 to run this strategy effectively. If you manage to grab both in the first two turns, congratulations you've essentially won. If you’re playing against this, block your opponent from getting the pair at all costs, even if it means spending 8 silvers to do so.
Side note: Enforcer vs. Gatekeeper: The Enforcer is slightly easier to play in the early game imo. You'll be starved for silver at the start, and the Enforcer lets you generate a bit of income while also getting points by dropping to low virtue so the first catch at the Town Center is free, catching your opponent’s workers, and sending them to jail. This cycle nets you 1-2 silver + 1 gold while your opponent gains 2-3 resources, a trade you should be happy to make.
Side note: why pair the Enforcer with BM at all? The Enforcer looks strong enough on his own, so you might wonder why you'd bother with the Black Market. The reason is that a pure Enforcer strategy is trivially easy to counter. If all you do is catch and jail, you net about 1-2 silver and 1 gold every 2 turns. Your opponent can just completely ignore their jailed workers and place workers on the Mines, picking up 2 clay and 1 gold every 2 turns. That's 1 point every 2 turns, the same rate as you. It becomes a wash, and you've built your whole game around an apprentice that isn't actually generating an advantage. The Black Market is what breaks the symmetry: it forces your opponent to care about their jailed workers, which is what makes the Enforcer's catch-and-jail loop actually threatening.
⠄・ ⋆ ・ ⠄⠂⋆ ・ ⠄⠂⋆ ・ ⠄⠄・ ⋆ ・ ⠄⠂⋆ ・ ⠄⠂⋆ ・ ⠄⠄・ ⋆ ・ ⠄⠂⋆ ・ ⠄⠂⋆ ・ ⠄⠄・ ⋆ ・ ⠄⠂⋆ ・ ⠄⠂⋆ ・ ⠄
The Mid Game — Building Your Engine
This is where you pick up your second through fifth apprentices. Prioritize anything related to the Black Market, but your exact shopping list depends on your starter.
For Gatekeeper
Your number one problem is silver. Snap up these three immediately if they show up:
Your opponent may try to trigger the BM reset to saddle you with debt. Neutralize this by hiring Debt Collector apprentices. This serves double duty: it removes your opponent's incentive to trigger resets and blocks them from using the Debt Collector as a counter to the BM strategy (more on counters below).
The Late Game — Building to Win
Now you're looking for 3–4 buildings that synergize with your set up. Target buildings with 15+ point potential.
For Enforcer:
If you have been getting and paying debt (like you should):
For Gatekeeper:
You typically won't accumulate enough of any single resource or enough debt to power the resource-dependent buildings effectively (the BM gives random resources, making it hard to specialize). Instead, target buildings that use marble or gold with minimal secondary costs. The Graveyard and University are good examples. In general, go for the big 10+ point buildings.
You will get plenty of marble from BM.
⠄・ ⋆ ・ ⠄⠂⋆ ・ ⠄⠂⋆ ・ ⠄⠄・ ⋆ ・ ⠄⠂⋆ ・ ⠄⠂⋆ ・ ⠄⠄・ ⋆ ・ ⠄⠂⋆ ・ ⠄⠂⋆ ・ ⠄⠄・ ⋆ ・ ⠄⠂⋆ ・ ⠄⠂⋆ ・ ⠄
Countering the Black Market Strategy
Hard Counter: Debt strategy
The BM strategy's biggest vulnerability is the early-game silver shortage. Exploit it by grabbing Debt Collector apprentices and resetting the BM yourself to take the debt willingly. This forces the BM player to re-setup, costing them 5 silver and 2 virtue each time (or 3 silver and 2 virtue if they cut corners). Eventually they hit 0 virtue and each setup costs 5 silver + 2 debt, requiring 8 silver to clear, effectively 13 silver per cycle. That's completely unsustainable.
Soft Counter: Cathedral Rush with Acolyte
Pair this with concentrated resource collection. The Cathedral complements this nicely since it doesn't care whether you give it wood or stone, so you can go all-in on quarry for 3 turns, then all-in on forest, and then use what you don't need for your building to pay for the Cathedral. You can even commit a 4th or 5th worker to the same spot without worrying about how to spend it as the Cathedral alone will use 21 (12 base requirements + 9 for 3 marbles).
Key tips when countering:
Asymmetric Character
Not all characters interact with BM the same way. A few important callouts:
Hugo — If your opponent is Hugo, do not play BM even if you see the perfect set up. He can pay 2 silver to shut down your entire strategy.

Theresa — Gold and marble count double for the Castle and Observatory. With 10 gold and 10 marble plus both buildings, a normal player gets 10 virtues (5 + 5). Theresa gets 20.



Frederick & Clovis — Both function similarly to the Acolyte's acceleration effect, so be cautious when facing them. They can speed up the game in ways that undercut your stalling plan.


⠄・ ⋆ ・ ⠄⠂⋆ ・ ⠄⠂⋆ ・ ⠄⠄・ ⋆ ・ ⠄⠂⋆ ・ ⠄⠂⋆ ・ ⠄END⠄・ ⋆ ・ ⠄⠂⋆ ・ ⠄⠂⋆ ・ ⠄⠄・ ⋆ ・ ⠄⠂⋆ ・ ⠄⠂⋆ ・ ⠄
⠄・ ⋆ ・ ⠄⠂⋆ ・ ⠄⠂⋆ ・ ⠄⠄・ ⋆ ・ ⠄⠂⋆ ・ ⠄⠂⋆ ・ ⠄⠄・ ⋆ ・ ⠄⠂⋆ ・ ⠄⠂⋆ ・ ⠄⠄・ ⋆ ・ ⠄⠂⋆ ・ ⠄⠂⋆ ・ ⠄
Why Play Black Market?
If you're anything like me, you look at the board and think: collecting resources and building stuff is boring. The Black Market (BM) strategy is for players who'd rather watch the world burn. Specifically, their opponent's world.
This guide focuses on 1v1 play. The principles translate to 3+ player games, but the politics and timing get significantly more complicated. In a 1v1, your Town Center target is obvious, there's only one opponent. In a multiplayer game, you have to decide whose workers to catch, and that means constantly evaluating who's actually ahead. Which is hard to do consistently.
⠄・ ⋆ ・ ⠄⠂⋆ ・ ⠄⠂⋆ ・ ⠄⠄・ ⋆ ・ ⠄⠂⋆ ・ ⠄⠂⋆ ・ ⠄⠄・ ⋆ ・ ⠄⠂⋆ ・ ⠄⠂⋆ ・ ⠄⠄・ ⋆ ・ ⠄⠂⋆ ・ ⠄⠂⋆ ・ ⠄
Key Concepts Before You Start
Before diving in, internalize these fundamentals. They'll help you adapt on the fly.
- The BM strategy is not about gaining resources from the Black Market. It's about setting up the Black Market reset so that your opponent is forced into a lose-lose: either play sub-optimally to avoid the reset, or eat the debt when it triggers. You accomplish this by playing the Black Market twice and putting your opponent's workers in jail (Guardhouse) before the reset happens.
To understand why this is so punishing, think about what "playing sub-optimally" actually means here. To avoid the reset, your opponent has to spend a turn releasing 2-3 workers from jail. That's an entire turn where they're not collecting resources, not building, not advancing their game, and most importantly, they won't get to enjoy the polynomial resource gain effect. And once they've spent that turn freeing their workers, you can catch the very worker they used to do the releasing and throw that one in jail, restarting the whole cycle. So their choices boil down to: stay trapped in this cycle where they net 1-2 resources every 2 turns, or leave the workers in jail and eat the debt when the reset hits. Either way, you come out ahead.
- Resource gains is polynomial, not linear. If you place n workers on a single resource spot, your total yield is n(n+1)/2 . That is a polynomial function. Three consecutive workers on the quarry = 6 stones. Spread those same three workers across three different spots and you only get 3 total resources (or 4 if you count 2 clays). Always concentrate your worker placements.
⠄・ ⋆ ・ ⠄⠂⋆ ・ ⠄⠂⋆ ・ ⠄⠄・ ⋆ ・ ⠄⠂⋆ ・ ⠄⠂⋆ ・ ⠄⠄・ ⋆ ・ ⠄⠂⋆ ・ ⠄⠂⋆ ・ ⠄⠄・ ⋆ ・ ⠄⠂⋆ ・ ⠄⠂⋆ ・ ⠄
The Early Game — Setting Up
You will need one of these two apprentices on Turn 1 to run this strategy effectively. If you manage to grab both in the first two turns, congratulations you've essentially won. If you’re playing against this, block your opponent from getting the pair at all costs, even if it means spending 8 silvers to do so.
- Enforcer: Gains 1 gold when sending captured worker(s) to jail.

- Gatekeeper: Releases 2 workers from jail when the black market resets.

- Turns 1–3: Visit the Black Market twice.

- Turn 3-4: Your opponent has placed workers somewhere. Capture them and send them to jail.

- Turn 5-7:
If you started with the Gatekeeper: Your opponent will likely release their workers from jail, put them back inside. But if your opponent actually helps you reset the BM here, you’re likely not going to have enough silver to set it up again for a while. That's fine. Drop to low virtue so you pay −1 tax, then use the free Town Center action to catch-and-release 2 workers in a loop. Each cycle generates a few silver, which you could use to set up another BM cycle.
If you started with the Enforcer: Your opponent most likely will triggers the BM reset here, sticking you with a debt. Don't panic. Silver is never a long-term problem for the Enforcer, you'll have enough silver to pay it off later. After eating the debt, stop visiting the BM for a few turns. Instead, keep catching workers and jailing them to stockpile silver, then set up another BM cycle.
Side note: Enforcer vs. Gatekeeper: The Enforcer is slightly easier to play in the early game imo. You'll be starved for silver at the start, and the Enforcer lets you generate a bit of income while also getting points by dropping to low virtue so the first catch at the Town Center is free, catching your opponent’s workers, and sending them to jail. This cycle nets you 1-2 silver + 1 gold while your opponent gains 2-3 resources, a trade you should be happy to make.
Side note: why pair the Enforcer with BM at all? The Enforcer looks strong enough on his own, so you might wonder why you'd bother with the Black Market. The reason is that a pure Enforcer strategy is trivially easy to counter. If all you do is catch and jail, you net about 1-2 silver and 1 gold every 2 turns. Your opponent can just completely ignore their jailed workers and place workers on the Mines, picking up 2 clay and 1 gold every 2 turns. That's 1 point every 2 turns, the same rate as you. It becomes a wash, and you've built your whole game around an apprentice that isn't actually generating an advantage. The Black Market is what breaks the symmetry: it forces your opponent to care about their jailed workers, which is what makes the Enforcer's catch-and-jail loop actually threatening.
⠄・ ⋆ ・ ⠄⠂⋆ ・ ⠄⠂⋆ ・ ⠄⠄・ ⋆ ・ ⠄⠂⋆ ・ ⠄⠂⋆ ・ ⠄⠄・ ⋆ ・ ⠄⠂⋆ ・ ⠄⠂⋆ ・ ⠄⠄・ ⋆ ・ ⠄⠂⋆ ・ ⠄⠂⋆ ・ ⠄
The Mid Game — Building Your Engine
This is where you pick up your second through fifth apprentices. Prioritize anything related to the Black Market, but your exact shopping list depends on your starter.
For Gatekeeper
Your number one problem is silver. Snap up these three immediately if they show up:
- Trickster, Peddler, Illusionist



- Trickster: Reduces BM cost by 1 silver, making a solo BM reset cost only 3 silver.
- Peddler: Gain 2 silver when the BM resets.
- Illusionist: No virtue cost. So you will not be getting debt from negative virtue.
- With all three, a BM reset costs you just 1 silver with no virtue loss. That's an engine.
Your opponent may try to trigger the BM reset to saddle you with debt. Neutralize this by hiring Debt Collector apprentices. This serves double duty: it removes your opponent's incentive to trigger resets and blocks them from using the Debt Collector as a counter to the BM strategy (more on counters below).
- Debt Collectors



- Swindler, Jeweller


- Do not build anything (yet). Every building you construct accelerates the end of the game. You've spent multiple turns assembling your engine. You want a long game so you can extract maximum value from it. The BM generates points without advancing the game clock, so time is on your side.
- Overload your opponent. Building locks workers in the Guildhall. As the game drags on, your opponent has to juggle resource collection, building, releasing workers from jail, earning silver, and paying off debt all with a shrinking workforce. Eventually something breaks. That's when you win.
The Late Game — Building to Win
Now you're looking for 3–4 buildings that synergize with your set up. Target buildings with 15+ point potential.
For Enforcer:
- Castle
If you have been getting and paying debt (like you should):
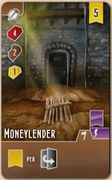
- Reservoir, Moneylender, Trading Post


For Gatekeeper:
You typically won't accumulate enough of any single resource or enough debt to power the resource-dependent buildings effectively (the BM gives random resources, making it hard to specialize). Instead, target buildings that use marble or gold with minimal secondary costs. The Graveyard and University are good examples. In general, go for the big 10+ point buildings.
- Graveyard, University


You will get plenty of marble from BM.
- Observatory
- The huts



- Crane

⠄・ ⋆ ・ ⠄⠂⋆ ・ ⠄⠂⋆ ・ ⠄⠄・ ⋆ ・ ⠄⠂⋆ ・ ⠄⠂⋆ ・ ⠄⠄・ ⋆ ・ ⠄⠂⋆ ・ ⠄⠂⋆ ・ ⠄⠄・ ⋆ ・ ⠄⠂⋆ ・ ⠄⠂⋆ ・ ⠄
Countering the Black Market Strategy
Hard Counter: Debt strategy
The BM strategy's biggest vulnerability is the early-game silver shortage. Exploit it by grabbing Debt Collector apprentices and resetting the BM yourself to take the debt willingly. This forces the BM player to re-setup, costing them 5 silver and 2 virtue each time (or 3 silver and 2 virtue if they cut corners). Eventually they hit 0 virtue and each setup costs 5 silver + 2 debt, requiring 8 silver to clear, effectively 13 silver per cycle. That's completely unsustainable.
Soft Counter: Cathedral Rush with Acolyte
- Acolyte

Pair this with concentrated resource collection. The Cathedral complements this nicely since it doesn't care whether you give it wood or stone, so you can go all-in on quarry for 3 turns, then all-in on forest, and then use what you don't need for your building to pay for the Cathedral. You can even commit a 4th or 5th worker to the same spot without worrying about how to spend it as the Cathedral alone will use 21 (12 base requirements + 9 for 3 marbles).
Key tips when countering:
- Don't rush hiring apprentices early. If you hire a second apprentice on Turn 1 and the revealed replacement is the Enforcer or Gatekeeper, and your opponent already has the other one, the game is over. Just leave the table.
- Ignore your jailed workers when you can. If the BM player can't punish you with a reset (not enough jailed workers or not enough silver), don't waste a turn freeing workers. Collect resources instead.
- Consider eating the debt sometime. Even with 2 workers in jail and the Gatekeeper in your opponent's hand, consider leaving them. You'll take 1 debt but the BM player needs several turns to rebuild their setup. That's 3–4 turns of uncontested resource collection for you.
- Build in burst. Don't build piecemeal, save up until you can construct everything in one go. Every building you place locks a worker in the Guildhall, and you want to keep as many workers in hand as possible to avoid overloading. Ideally, you stockpile enough resources to drop 5 cathedrals and 3–4 small buildings all at once.
- Play small buildings and be efficient. Speed is your win condition.
Asymmetric Character
Not all characters interact with BM the same way. A few important callouts:
Hugo — If your opponent is Hugo, do not play BM even if you see the perfect set up. He can pay 2 silver to shut down your entire strategy.
Theresa — Gold and marble count double for the Castle and Observatory. With 10 gold and 10 marble plus both buildings, a normal player gets 10 virtues (5 + 5). Theresa gets 20.
Frederick & Clovis — Both function similarly to the Acolyte's acceleration effect, so be cautious when facing them. They can speed up the game in ways that undercut your stalling plan.
⠄・ ⋆ ・ ⠄⠂⋆ ・ ⠄⠂⋆ ・ ⠄⠄・ ⋆ ・ ⠄⠂⋆ ・ ⠄⠂⋆ ・ ⠄END⠄・ ⋆ ・ ⠄⠂⋆ ・ ⠄⠂⋆ ・ ⠄⠄・ ⋆ ・ ⠄⠂⋆ ・ ⠄⠂⋆ ・ ⠄
